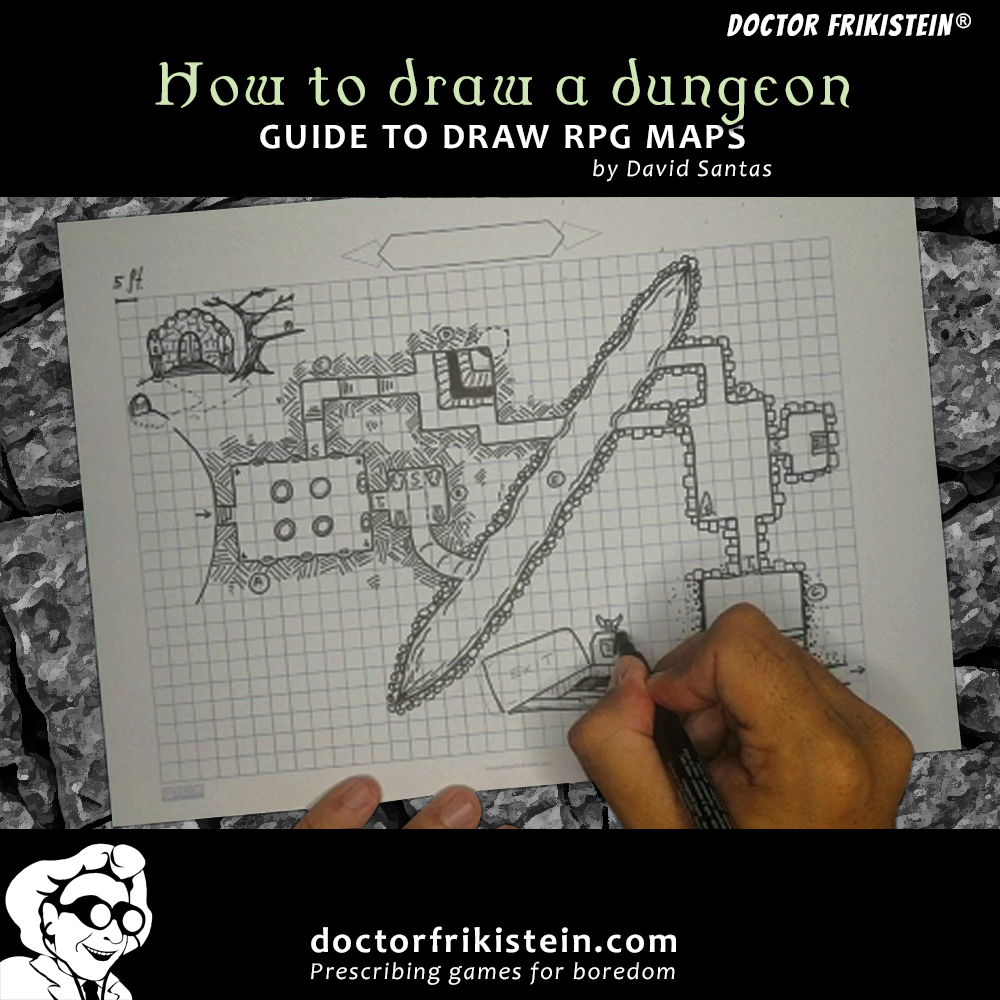
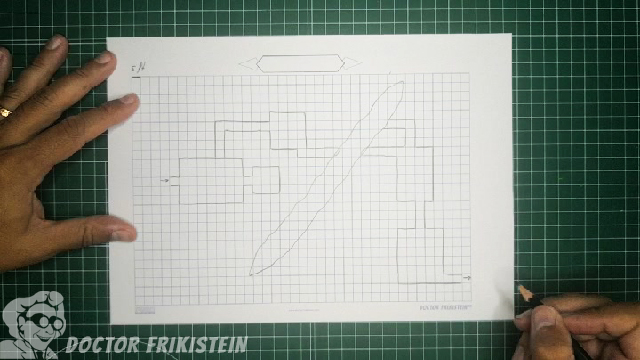
In this article we show you a guide to draw a map of a dungeon for role-playing games in just 10 steps.
INTRODUCTION
Since I started reading RPG manuals, one of the things that most fascinated me was the maps where the games were set: dungeons, fortresses, dark guards and deep catacombs. When I started playing as Dungeon Master, one of the things that I loved was precisely to learn how to draw my own maps. In this basic guide I will teach you the steps to draw a map and you will see that it will be easier than it seems.
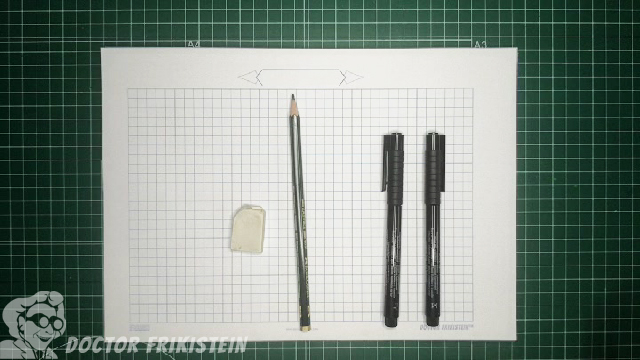
1. MATERIALS
- Graph paper: It is very common to divide the dungeon into squares to measure distances. It is also useful for measuring scale. I recommend a blue grid because if you want to scan the sheet in the future, it will be easy to remove the lines. Alternatively you can also use a template sheet. In my case I use a template grid map sheet that has the exact measurements and squares as the rpg play mat, so I make sure that the dungeon will have the same dimensions.
- Fine-tip markers: one thick and one thinner. I use a fine point 0.8 and another 0.4 respectively, but you can use the measurements that you like as long as one is finer than the other. Even a simple black marker and a black pen could work.
- Pencil: in principle any common graphite pencil is sufficient.
- Rubber: any but make sure it doesn’t stain the paper when you use it.
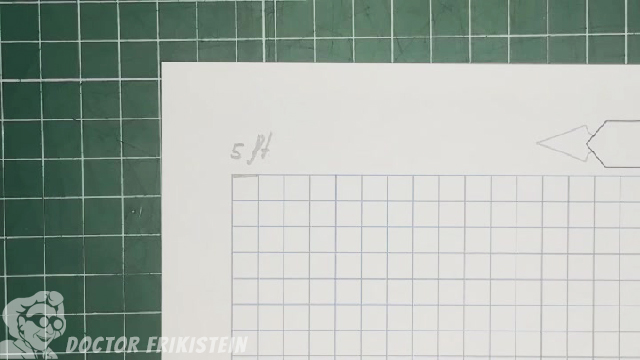
2. SCALE
As mentioned above, the graph paper can help you to measure the scale of your map. For a dungeon, the commonly used scale is that one square is equivalent to 5 feet. In Dungeons and Dragons for example the basic movement of a character is usually 30 feet, this is that in a turn he could move 6 squares.
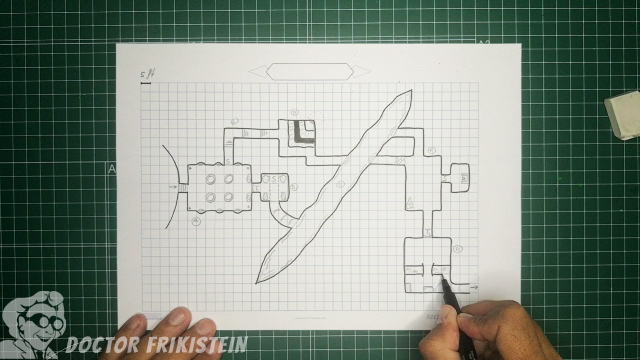
3. MAIN MAP
Now is the time to start our map. From the side use the pencil to draw an entrance and extend your map connecting rooms, corridors and grottoes that form the path of the dungeon.
The size of the map can obviously vary from a simple cave to the huge Under Mountain dungeon full of mazes and levels. But in my opinion a map of maximum 10 rooms is enough for a dungeon that occupies a single session. You can also use tables or dice to generate dungeons to help you to create your map.
Finally, draw the exit at the other end. It may also be that the exit is the same place of entry. There is no problem in this.
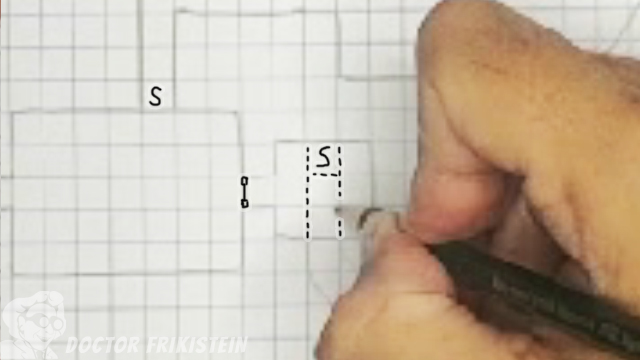
4. DOORS
Use some doors to separate some rooms. You can also include a secret door as this is very typical in role-playing games. Secret doors are usually indicated simply with an ‘S‘ wherever they are. Secret doors and gates allow the dungeon path to be less linear.
If there are tunnels or rooms at different levels, use brocken lines to indicate which area is at the lower level.
5. ARQUITECTURAL FEATURES
A dungeon is not usually a flat plant, there are usually elements in its construction such as stairs, columns and uneven terrain. As general rule the architectural features are part of the same structure of the dungeon so they are usually immovable or impassable by the characters and improve the feeling of depth.
Here I show you how to draw some of these architectural features:
- Stairs
- Slopes
- Cliffs
- Water
- Bridges and pits
- Uneven terrain (unlike slopes, slopes require climbing or penalize movement)
- Columns
- Rockfalls
- Niches
6. DECORATION ELEMENTS
Although we already have the entire route of the dungeon, now we can add some decorative elements that the characters could find in the rooms. As general rule the decorative elements are not part of the same structure of the dungeon but of content, so they are usually movable and passable by the characters.
I am of the thought that “less is more”, because a map with too many unnecessary elements is too overloaded. That is why I recommend putting only those elements relevant to the adventure or which occupy important physical space in the room. For example, it is not necessary to draw the curtains of a room, but a bed can be important since it occupies a space that partially obstructs movement.
Some of these decorative elements can be: statues, tombs, altars, furniture, chests, rocks and large vegetation.
It can also be important to highlight the points of light: such as torches and campifers to measure the lighting of the rooms.
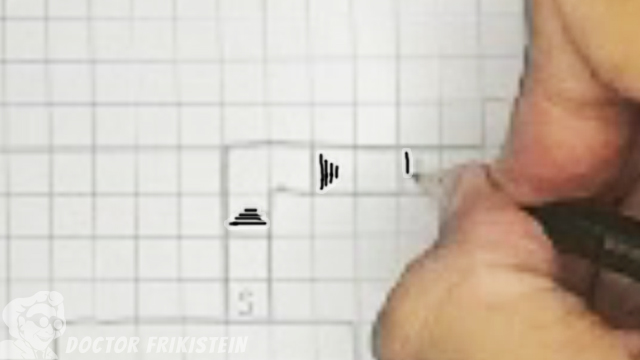
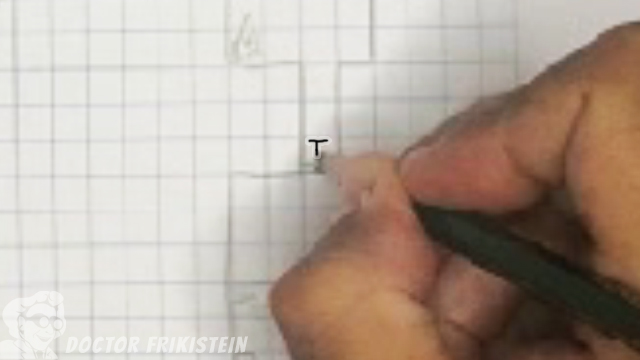
7. TRAPS
What would a dungeon be without traps? Well, it doesn’t have to be mandatory, but traps add an element of surprise and excitement to dungeons. In addition, traps, like monsters, can be an interesting encounter for players to act as a group and role-play their characters.
To draw a trap simply put a letter ‘T‘ to indicate where it is activated.
At this point your dungeon map would already be fully playable and functional. However, in the following steps I will show you how to improve the appearance of the map that can also help you if you want to scan it and share it easily.
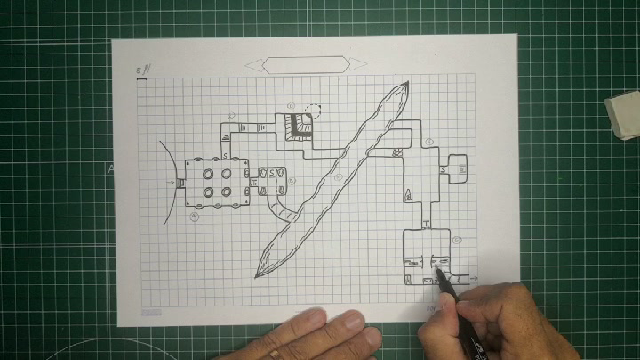
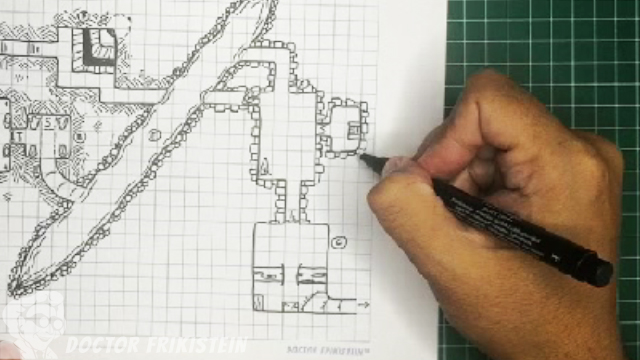
8. INK OUNTLINES
Now is the time to use our fine-tip markers to give our dungeon map a definitive and durable look.
With the thickest marker, go over the lines on the walls of the dungeon, and also those delimited areas that cannot be passed.
With the thinner marker, go over the rest of the elements.
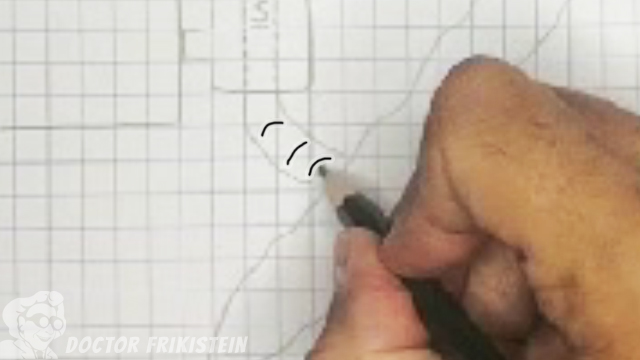
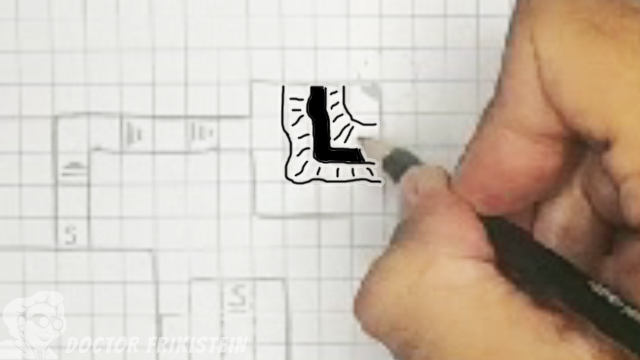
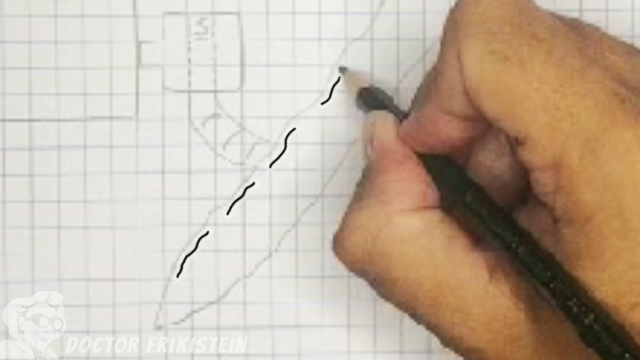
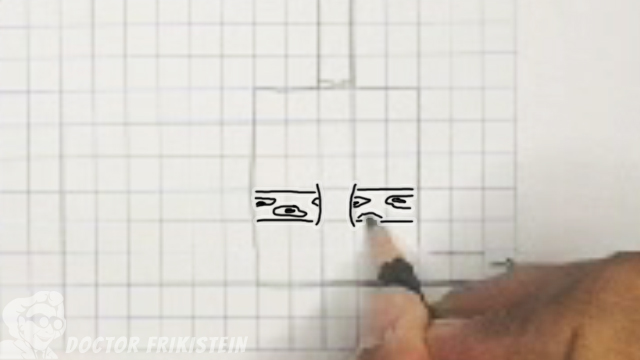
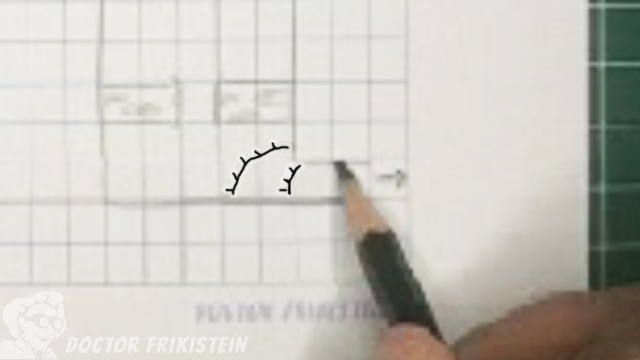
9. TEXTURES
Textures help to visually and aesthetically separate the playable part of the dungeon map from the non-playable part. Hence they are drawn from the dungeon wall. We will use the thinner fine-tip marker and we can give different aspects:
- Crosshatch: this would be a general look to give the non-playable area a dull look. The technique is to create groups of 3-4 diagonal stripes and changing the direction between each group.
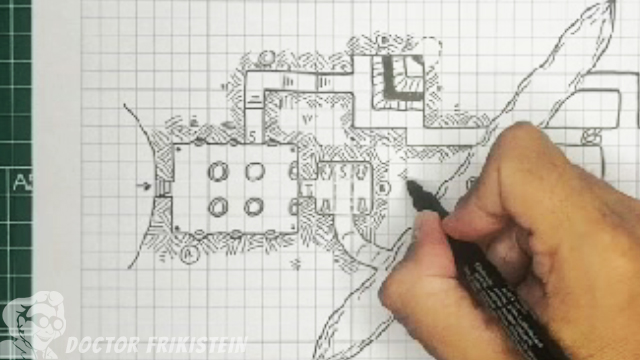
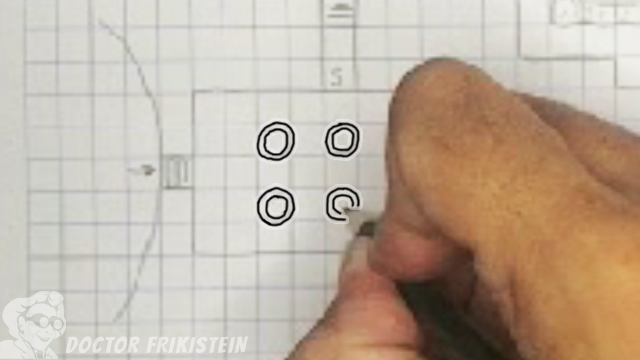
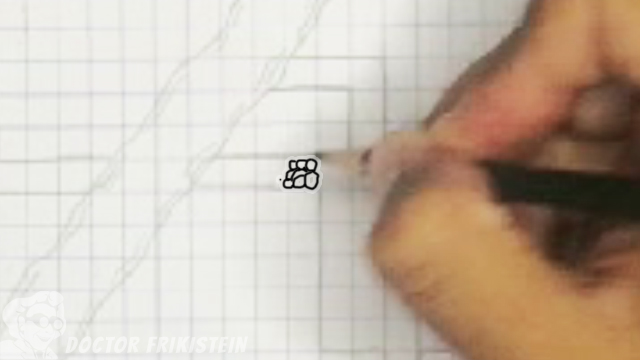
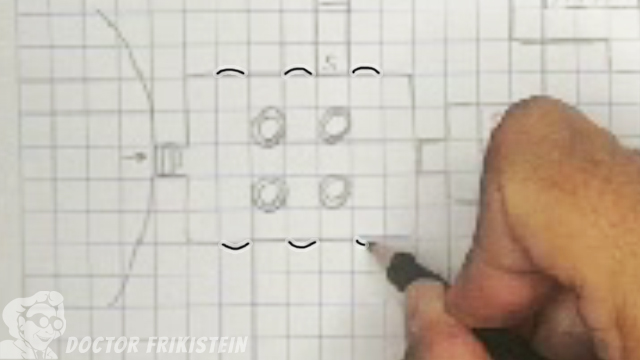
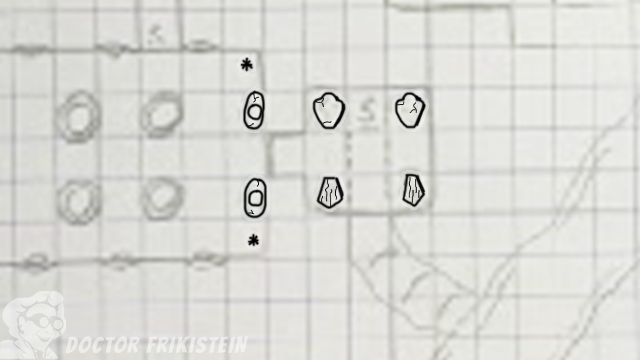
- Natural stone: This texture gives a good appearance for those natural areas, such as caves, grottos, as well as water areas such as rivers. The technique is to draw circular shapes alternating sizes.
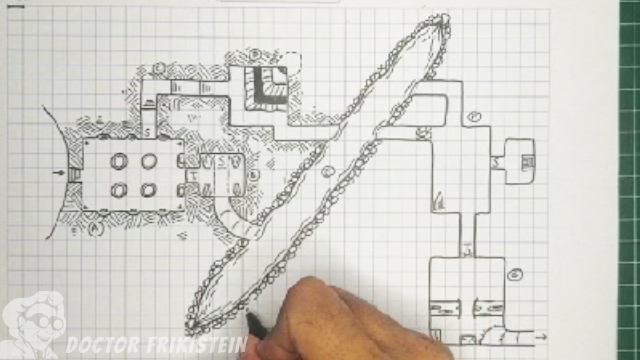
- Carved stone: in this case this texture can be useful for temples, fortresses or walls. The technique is to draw rectangular blocks alternating their sizes and making some stand out from the others.
- Earth: This texture, although very simple, is very effective to indicate underground areas. The technique is to thicken the wall a bit more and make large points near it and smaller, separate points as we move away.

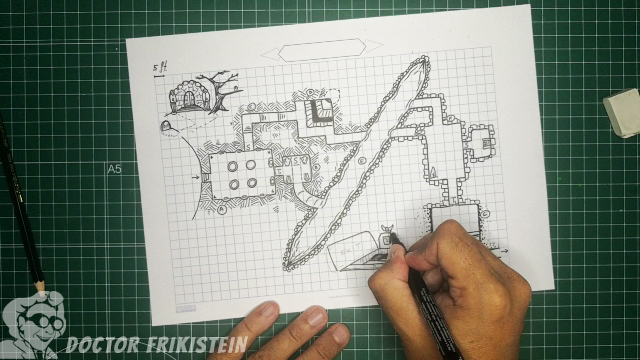
10. FINISHING TOUCHES
It is time to erase the pencil using the rubber and add some text, references and other final touches. I also like to include some artwork because it gives to the map a more artistic look.
READY
The map is already finished! Although you could add shadows and add more details to floors and furniture, I consider that these are more advanced techniques and need additional material.
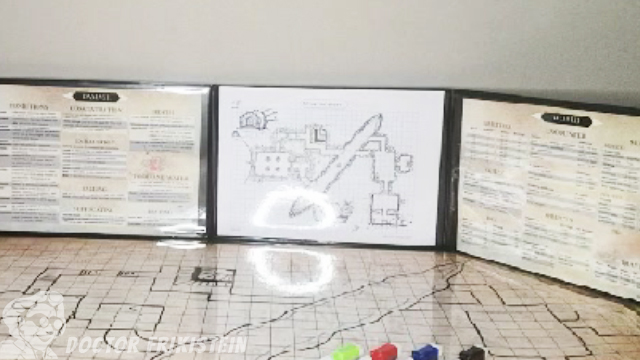
Dungeon map placed on the dungeon master screen and recreated on the rpg play mat.
VIDEO
A video summary of all the steps